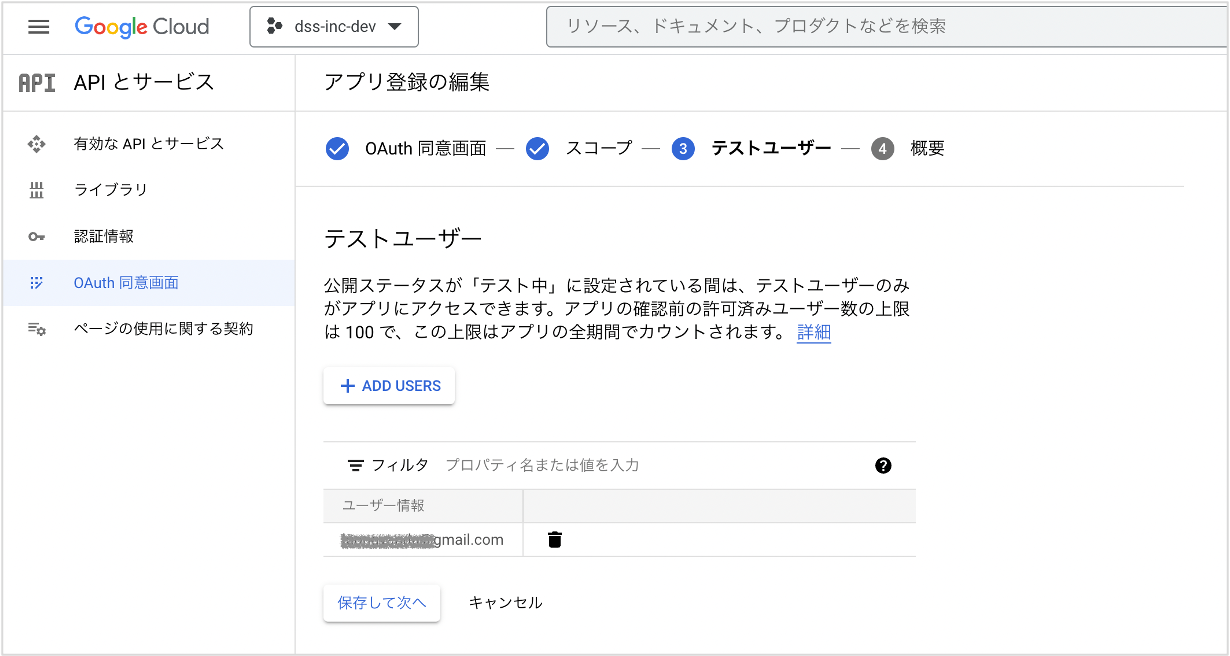
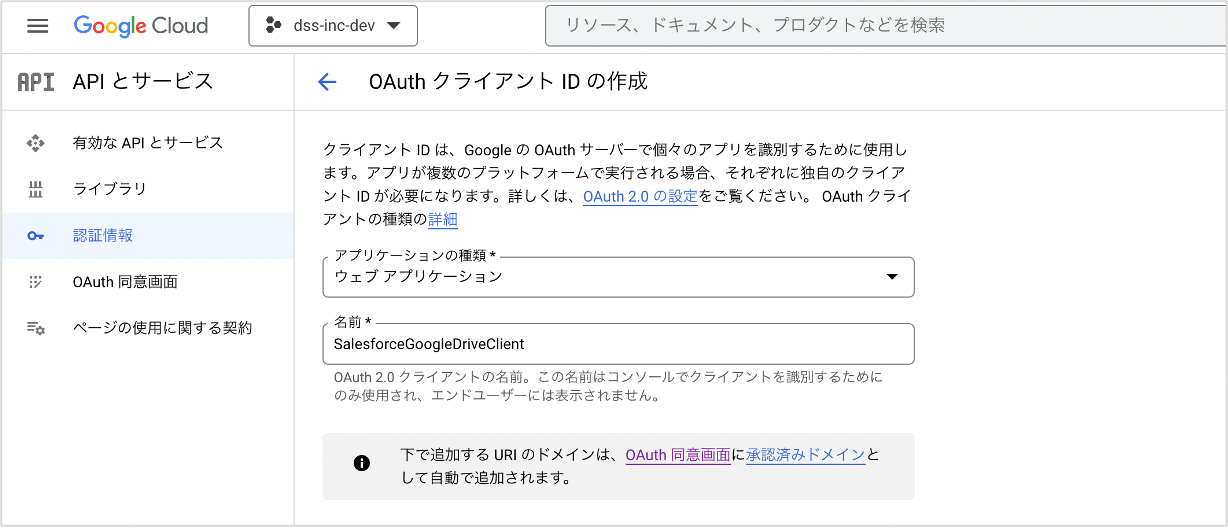
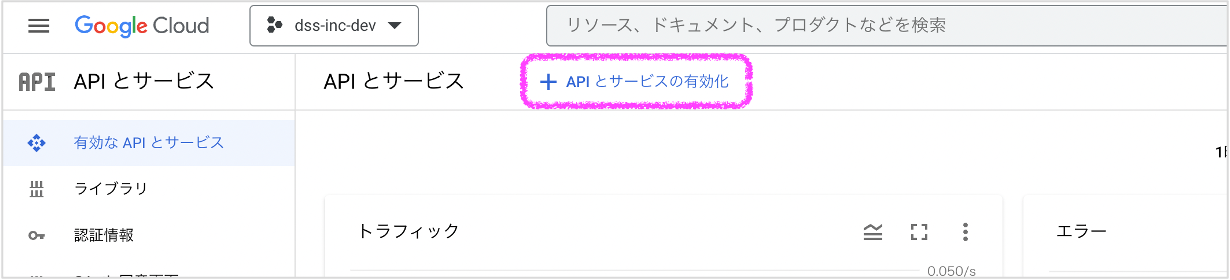
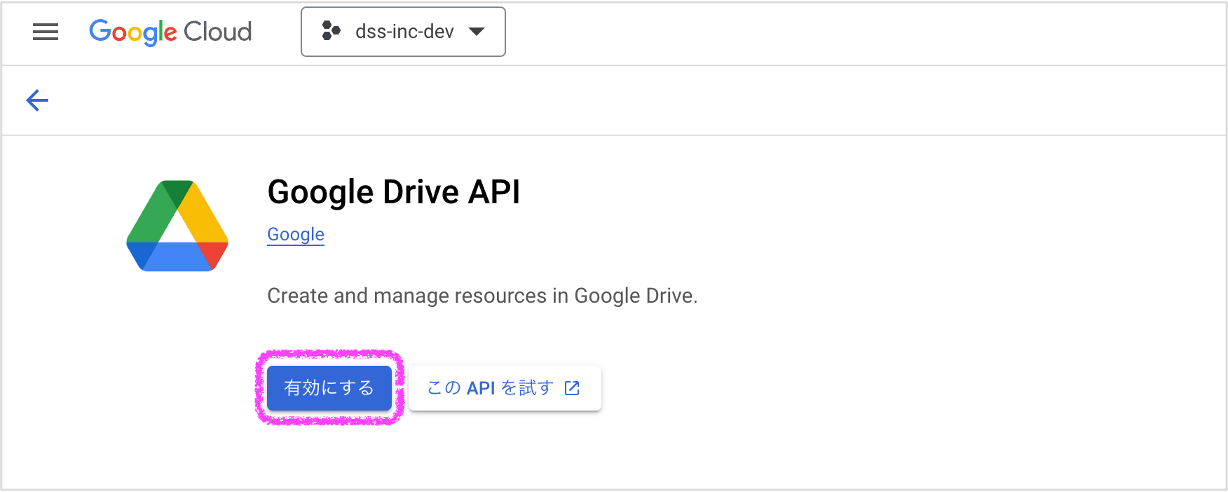
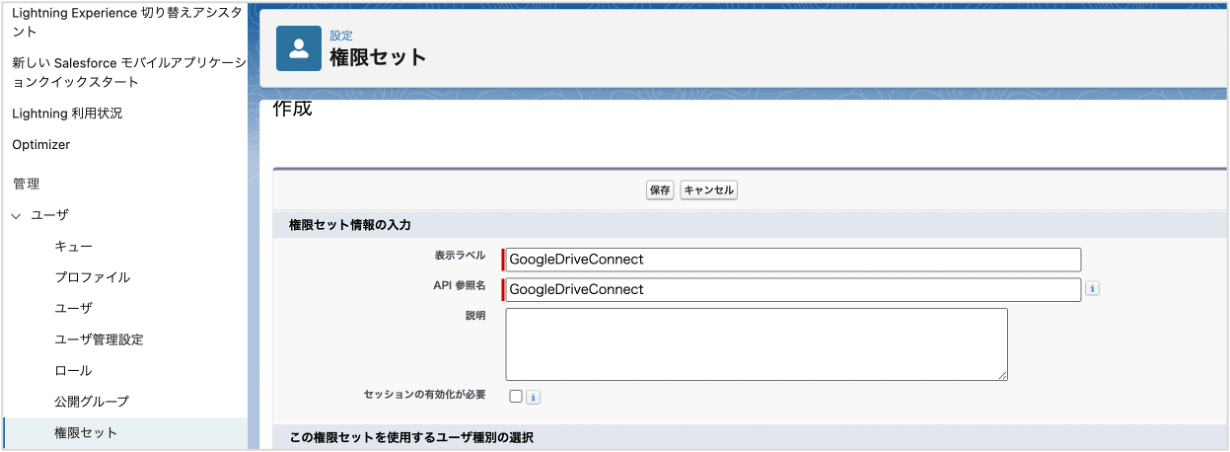
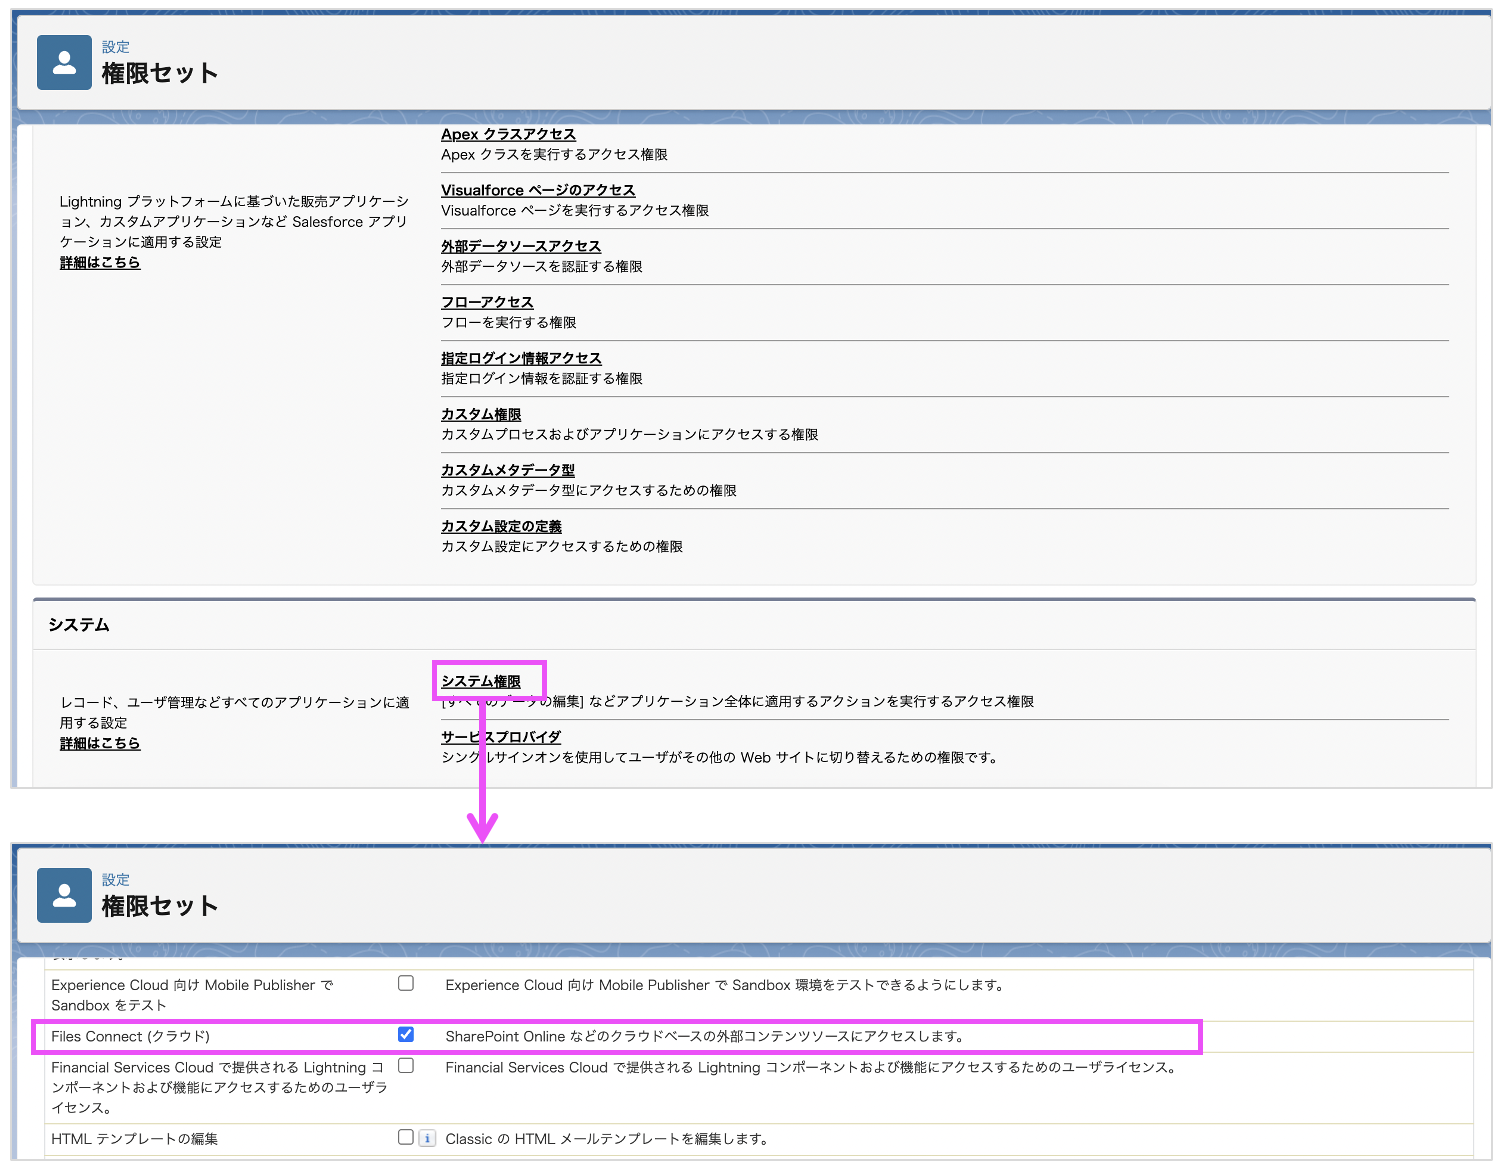
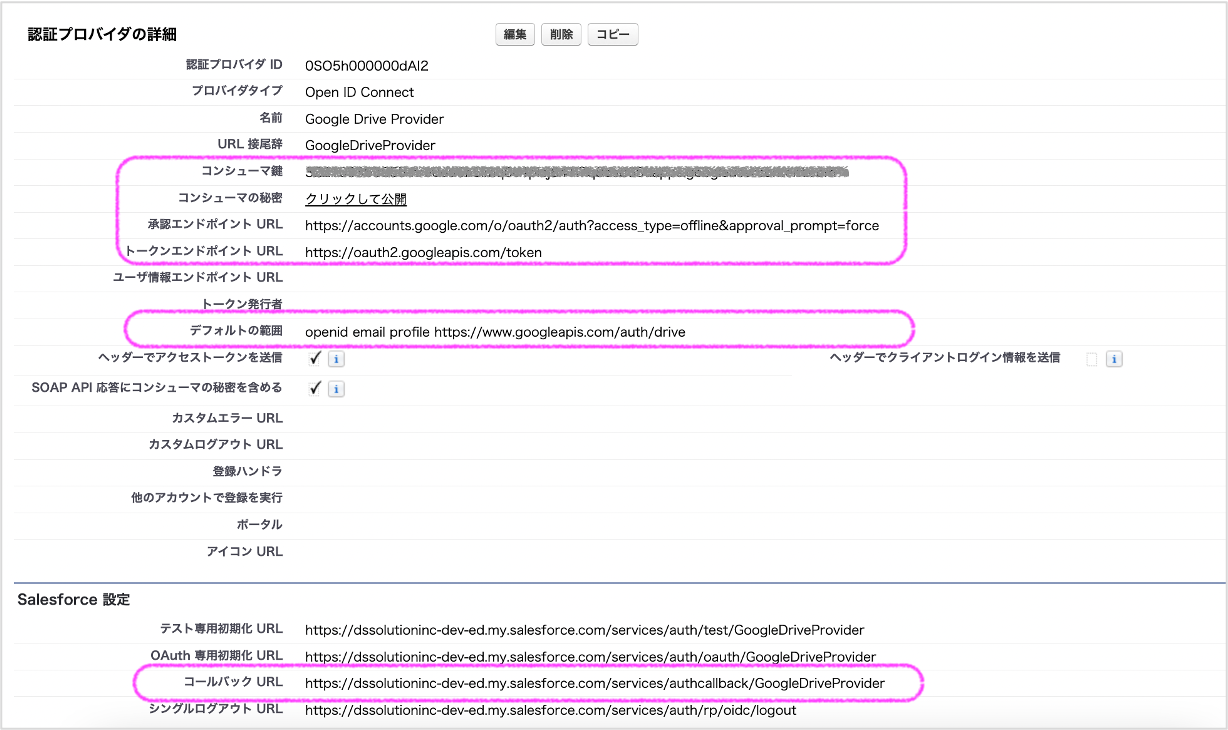
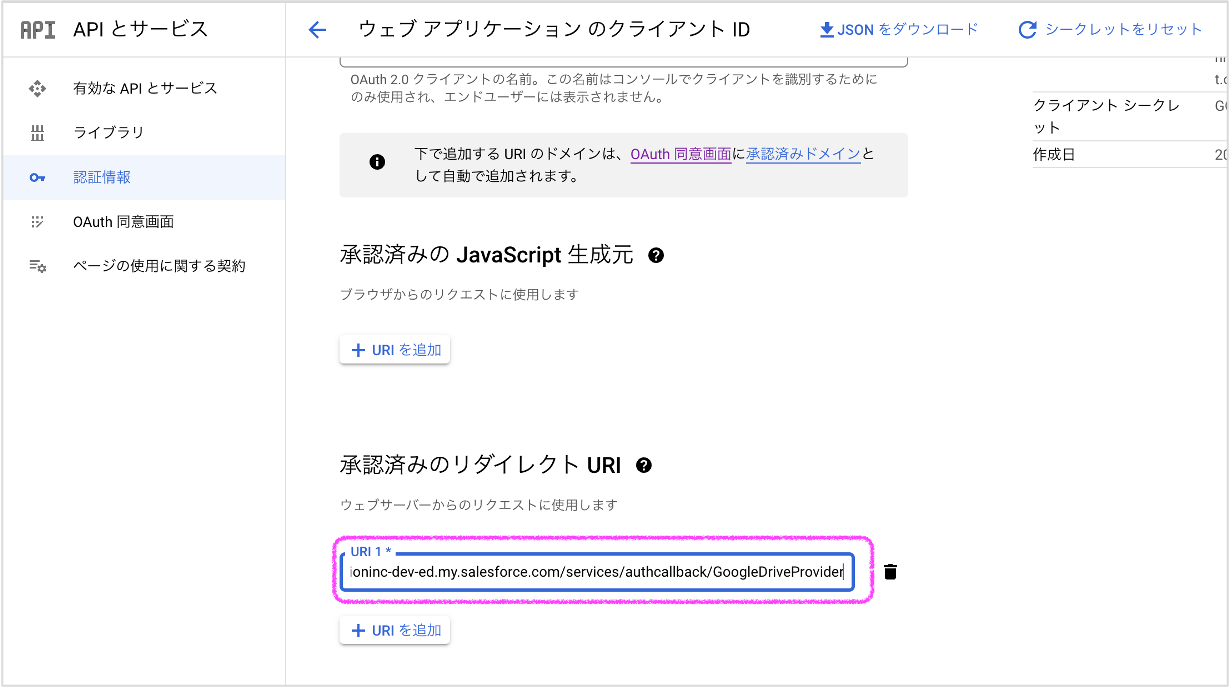
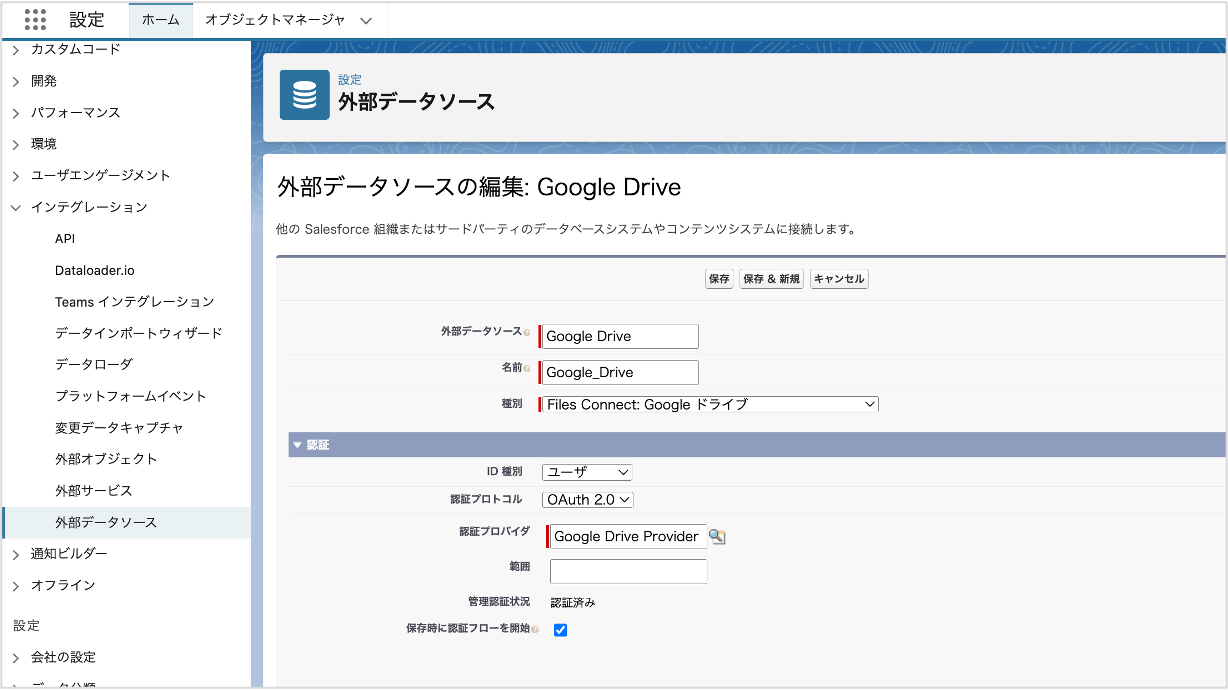
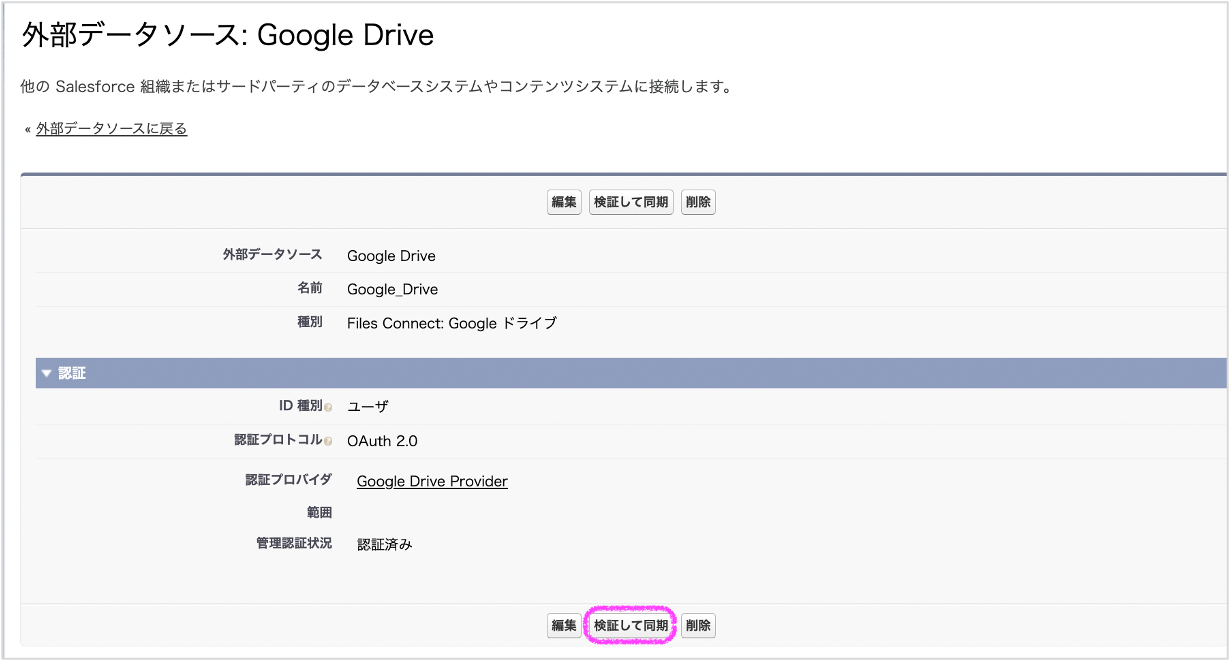
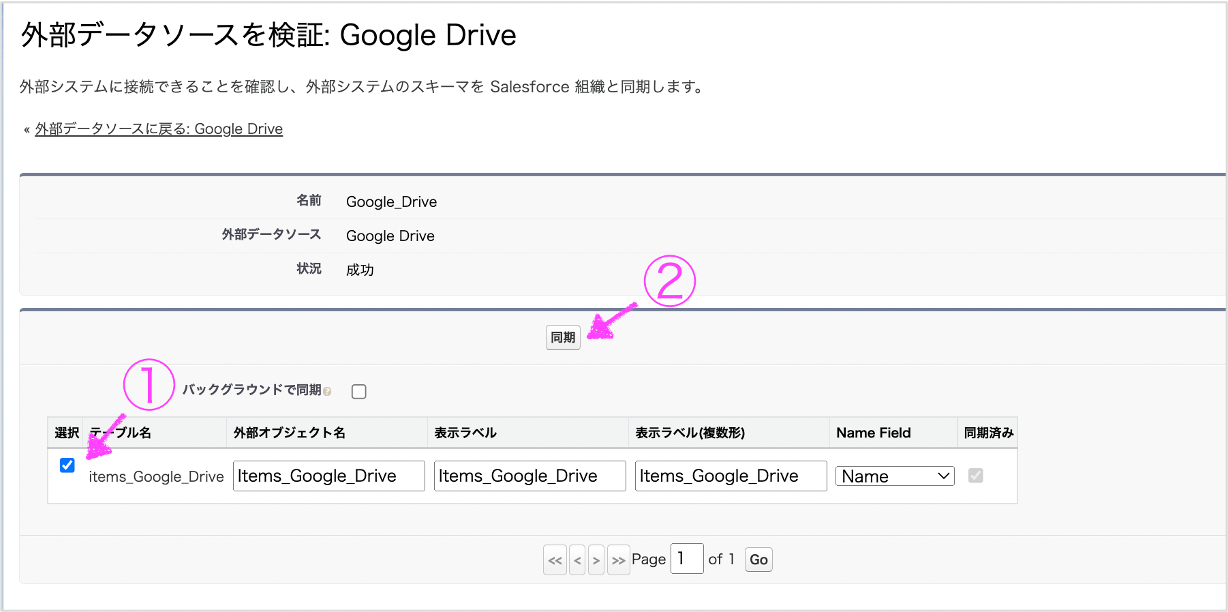
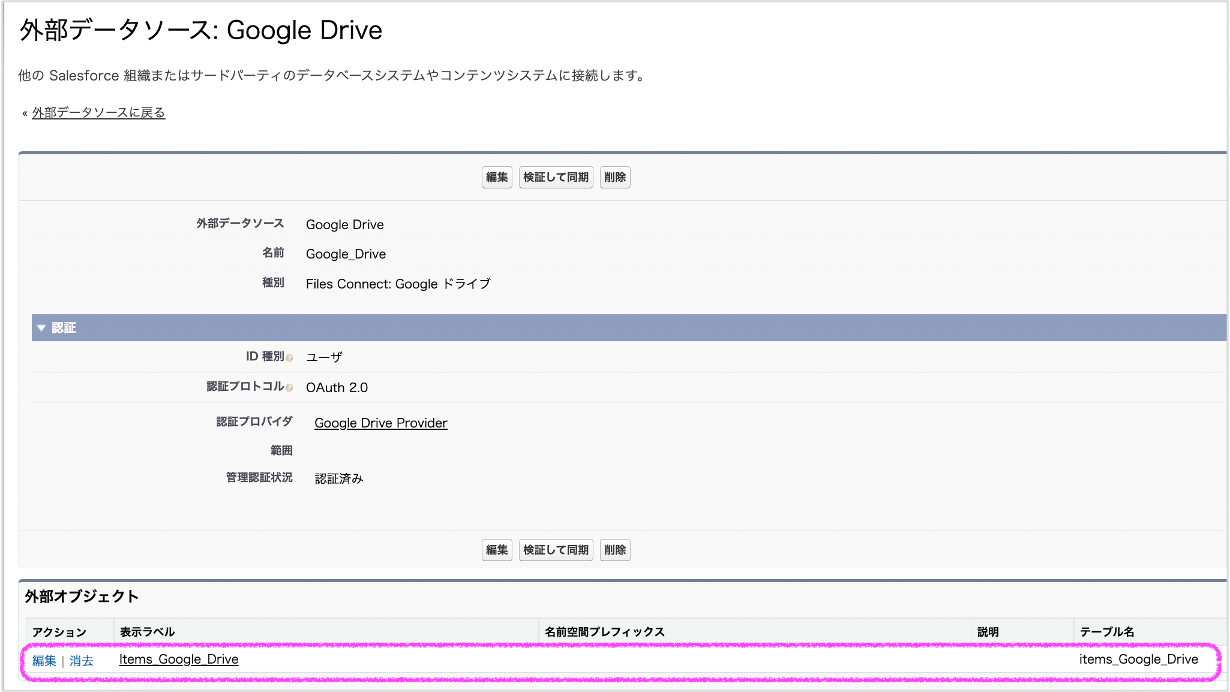
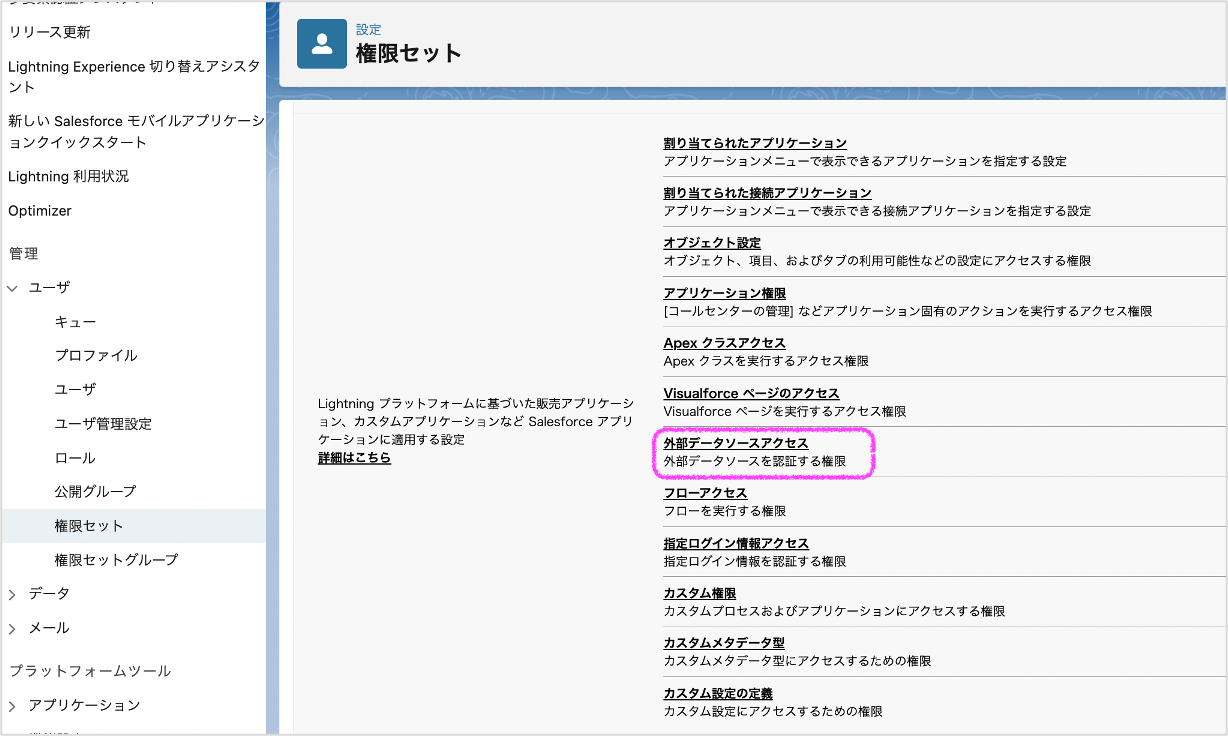
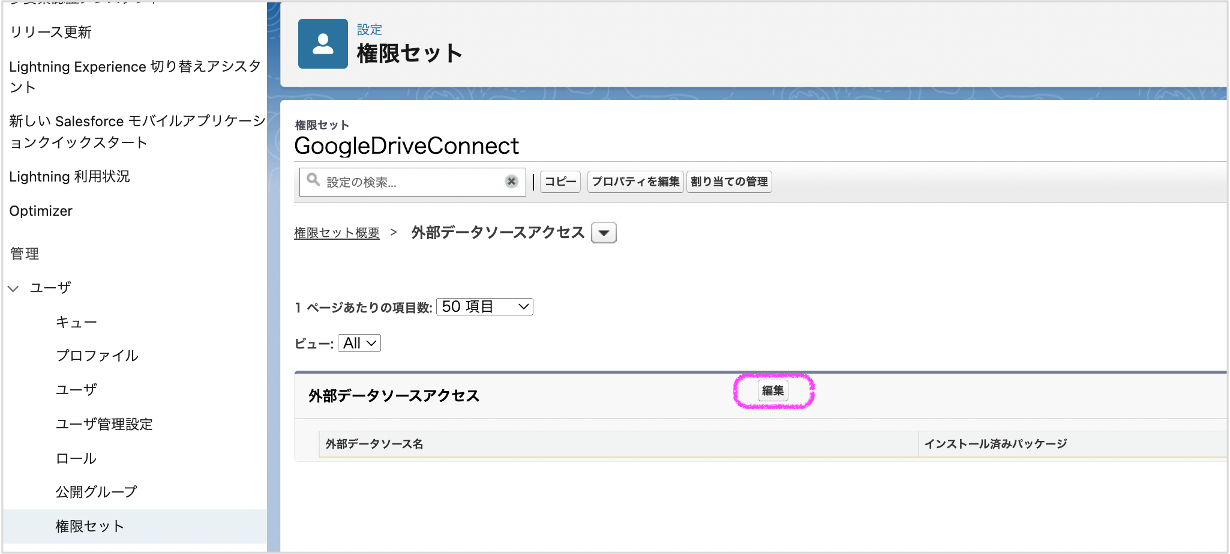
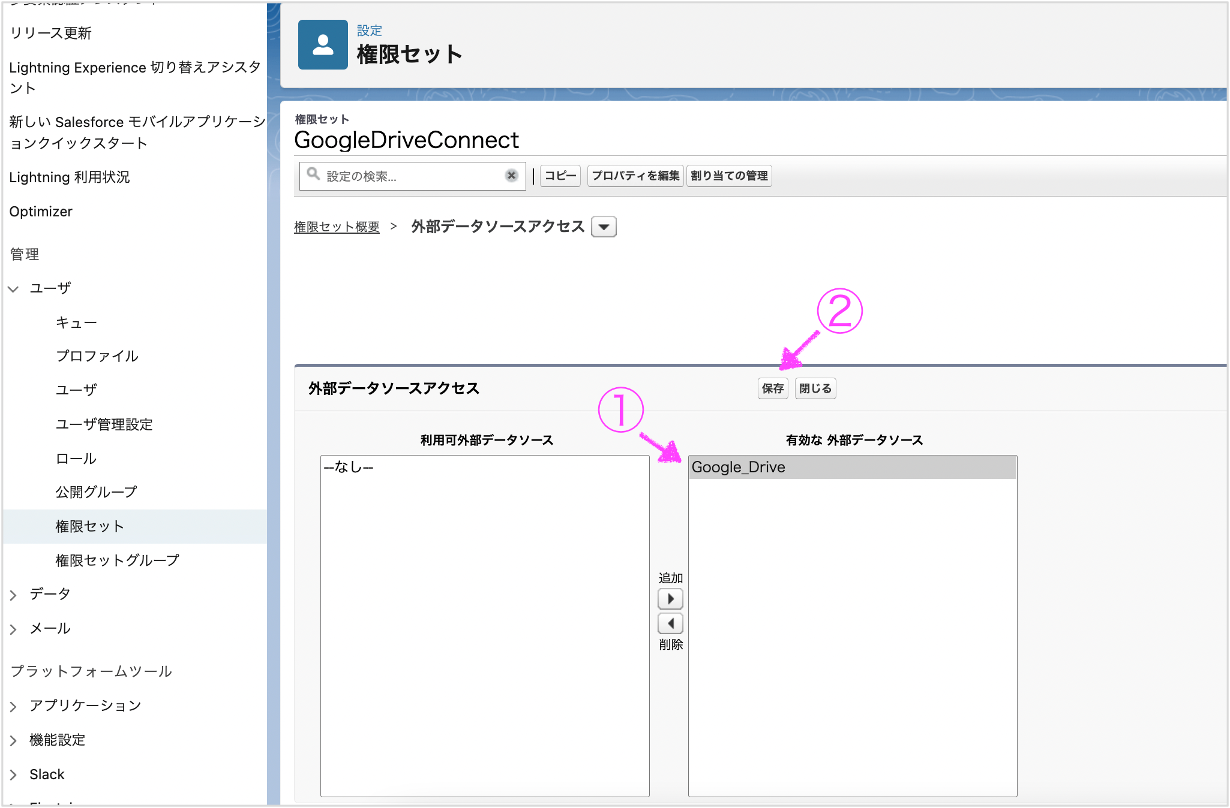
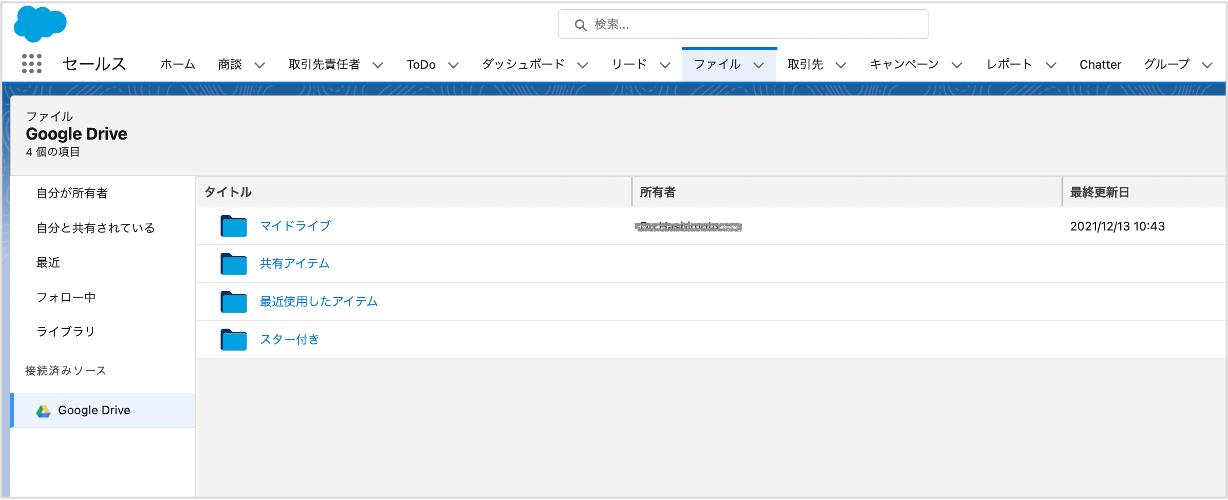
SalesforceからGoogle ドライブに連携 目次 Toggle 1.グーグルクラウド側の設定2.Salesforce側の設定3.SalesforceのファイルでGoogle Driveを楽しみ 1.グーグルクラウド側の設定 1.1 OAuth同意画面設定 GCPプロジェクトの中にAPIとサービスを開いて、OAuth同意画面を設定します。 アプリ名、ユーザーサポートメール、デベロッパーの連絡先情報を入力します。 ②スコープではデフォルトのままで進んでも大丈夫です。③テストユーザーはGmailのアカウントで接続する場合、追加する必要があります。会社のアカウントで(例えば弊社@dssolution.jp)接続する場合は追加が不要です。 1.2 承認情報の設定承認情報を作成します。OAuth 2.0 クライアント IDとアプリケーションの種類はウェブアプリケーションを選び、自由の名前を入力します。 リダイレクト URIはSalesforceのURLを設定しますが、Salesforce側はまだ設定されていないので、一旦スキップしても良いです。この設定はまた後で戻ります。作成できたら、クライアント IDとクライアント シークレットをコピーしてメモします。1.3 Google DriveのAPIを有効設定有効なAPIとサービスメニューを開いて、「+APIとサービスの有効化」をクリックして、「Google Drive API」を入力して検索します。 「Google Drive API」を選んで、有効にします。 2.Salesforce側の設定 2.1 権限セットDrive接続用の権限セットを作成します。 システム権限の中に、Files Connectの権限を有効します。 このチェックがないと、外部データソース作成するとき、「Files Connect:Googleドライブ」の選択肢が出ないです。 Googleドライブに連携権限をユーザーに付与します。対象のユーザーを開き、「権限セットの割り当て」のセクションで「GoogleDriveConnect」の権限セットをアサインします。 2.2 認証プロバイダの設定Open ID Connectタイプの認証プロバイダを作成します。 コンシューマ鍵とコンシューマ秘密:1.2で作成されたクライアント IDとクライアント シークレットを入力します。承認エンドポイントURL:https://accounts.google.com/o/oauth2/auth?access_type=offline&approval_prompt=forceトークンエンドポイントURL:https://accounts.google.com/o/oauth2/tokenデフォルトの範囲:openid email profile https://www.googleapis.com/auth/drive 作成できたら、コールバック URLをコピーして、1.2の承認情報を開き、承認済みのリダイレクトURIを入れます。 2.3 外部データソース作成 種別:File Connect: GoogleドライブID種別:ユーザ認証プロトコル:OAuth 2.0認証プロバイダ:2.2で作成された認証プロバイダを選択 保存すると、Googleの認証画面が出ます。認証アカウントを入力し、アクセスを許可します。 検証して同期を行います。 外部オブジェクトが作成されたことを確認します。 外部データソースを作成できたら、2.1の権限セットで権限を付与します。 3.SalesforceのファイルでGoogle Driveを楽しみ ファイルを開いて、Googleドライブのファイルを参照できます。1回目はGoogleドライブログインし、許可する必要があります。 参考https://help.salesforce.com/s/articleView?id=sf.admin_files_connect_google_xds.htm&type=5 その他の記事を読む 前の投稿現役ブリッジエンジニアが語ります!オフショア開発を成功させるためのポイント 次の投稿Googleスプレッドシート上でSalesforceデータを一括編集!「Data connector for Salesforce」を使ってみた! おすすめ GCPのサービスを利用権限設定 2020-01-03 Terraform用のGCPサービスアカウントの権限設定方法 2019-12-06 モバイルアプリ 開発 フレームワークおすすめ5選 2022-01-26